

Last update on 2026-05-02 at 07:07 / Affiliate links / Images from Amazon Product Advertising API
Nearly 30% of small-shop shirt orders need fixes after transfers fail — that’s wasted time and money.
I’ve tested a dozen heat press machines and stood in the middle of every common disaster: peeled vinyl, uneven lines, scorched polyester. This short buyer’s guide cuts through specs and shows what actually works in real use.

Ten picks are covered here, from budget starters to full-production rigs. I split them into best overall, best value, best for alignment, and best for production, with honest takes on performance, workflow, and whether I’d buy each one again.
This is built for U.S. home crafters, Etsy sellers, and small shops. Skim the winners, then check the buying checklist at the bottom before you decide.
How I tested and ranked heat presses for real-world heat transfer results
My testing simulates a busy shop day—lots of transfers, tight timing, and mixed materials. I run each unit through the same routine so comparisons are based on real performance, not marketing claims.
Test setup for shirts, tote bags, and common blanks
I use everyday blanks: cotton shirts, polyester blends, and canvas totes. These items expose uneven platen zones fast.
Tests include pre-press, applying an HTV patch, timed dwell, and cold peel versus hot peel checks. That workflow mimics how sellers do batches on tight schedules.
What “consistent results” means
Consistent results come down to three things: steady temperature across the platen, repeatable pressure, and even contact so transfers stick through wash cycles.
I watch for cold spots, edge drop-off, and pressure skew. If a unit shifts alignment or gives odd marks, it fails my basic durability checks.
Timing, settings, and material notes
- I note recommended settings, then verify actual surface temperature with an infrared gun.
- HTVRONT guidance: polyester often needs lower temperature (about 270-300°F for 10–15 seconds) with a protective sheet; typical HTV is ~305°F for 10–15 seconds—always follow brand instructions.
- When a unit runs hot or cold, I adjust dwell time and pressure and record the final time and transfer outcome.
| Test Element | Why it matters | Pass indicator |
|---|---|---|
| Platen evenness | Ensures full adhesion across the design | No cold zones on a grid test |
| Pressure control | Prevents edges peeling and uneven prints | Uniform imprint on shirts and totes |
| Temperature accuracy | Protects sensitive materials and saves time | Measured temp within ±5°F of setting |
If you’re a DIY crafter, Etsy seller, or running a small U.S. shop, this guide focuses on workflow and output quality, the stuff that actually matters when you’re shipping real items.
The best heat press machines of 2026
After weeks of back-to-back runs, ten models stood out. Short takes on each below, then a table for quick comparison.
- Best overall hybrid: HPN TrueSpec 16″ x 20″ Auto-Open Hybrid (★★★★★, 31 reviews)
- Best value clamshell: HPN MPress 15″ x 15″ (★★★★★, 429)
- Best for alignment: HPN Signature Series Slide-Out 16″ x 20″ (★★★★★, 243)
- Compact auto-open: HPN Signature Series 15″ x 15″ (★★★★★, 214)
- Craft-friendly: HPN CraftPro 15″ x 15″ (★★★★★, 485)
- Pressure upgrade: HPN Signature PRO w/ SurePressure (★★★★★, 166)
- Budget manual starter: HTW V3 15″ x 15″ Manual ($99–$175)
- Affordable auto-open: HTW V3 16″ x 20″ Auto-Open ($799)
- Smart shop: Hotronix Fusion IQ ($2,850)
- Production powerhouse: Insta 780 Dual Shuttle ($9,265)
The TrueSpec is my do-it-all pick for vinyl, DTF, and sublimation. The MPress is the value choice for everyday shirts. Slide-out models are worth the extra cost when alignment and speed both matter.
| Model | Best for | Top rating | Price (typ.) |
|---|---|---|---|
| HPN TrueSpec 16×20 | Versatile workflows (vinyl, dtf, sublimation) | ★★★★★ (31) | Mid-range |
| HPN MPress 15×15 | Value, small shops, starters | ★★★★★ (429) | Budget |
| Insta 780 Dual Shuttle | High-volume production | Professional reviews | High-end ($9,265) |
Choosing the right press type for your projects
Match the press style to your work and the whole process gets easier. Pick wrong and you’re fighting your equipment on every batch.
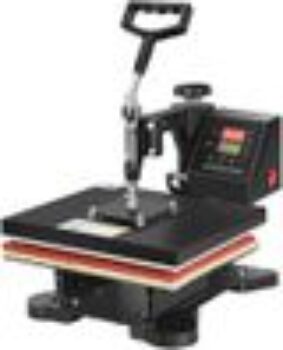
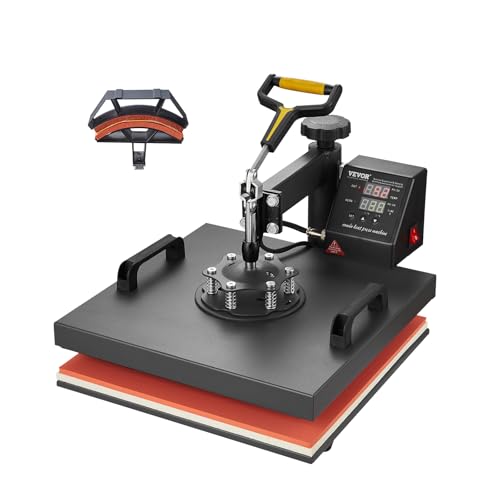
Clamshell designs: everyday shirts and heat transfer vinyl
Clamshells close like a book: simple rhythm, small footprint, fast for small runs. If you mostly make shirts and use transfer vinyl, a clamshell keeps fatigue low and throughput steady.
Swing-away models: thicker items and tricky placements
Swing-away designs rotate the platen clear of the lower base so you can line up awkward spots without heat in the way. Good for hoodies, layered designs, or anything bulky. Full visibility and less risk of accidental contact while aligning.
Slide-out platens: safer, faster workflow in a busy shop
Slide out the lower platen, set the item, slide it back under the heated plate. That’s the whole trick. Fewer burned knuckles, faster batch loading, better alignment. I default to these for higher-volume sellers and shops that need repeatable accuracy.
Manual vs auto-open vs automated pressing
Manual models are the cheapest option but they wear you out. Auto-open adds consistency and takes the guesswork out of every close. If you ship daily or run long shifts, auto-open cuts mistakes and saves your wrists.
| Use case | Best type | Why |
|---|---|---|
| Left-chest logos | Clamshell | Fast, compact, repeatable |
| Hoodies & thick items | Swing-away | Full platen clearance for safe alignment |
| High-volume batches | Slide-out / automated | Faster loading, less error, safer workflow |
Hobbyist: clamshell. Bulk orders: slide-out or automated. Bulky items: swing-away. Buy for your products, not the spec sheet.
Size, platen options, and what they mean for shirts, bags, and designs
Platen size causes more shop headaches than almost anything else. It decides what fits in one pass, what needs a second run, and which jobs end in edge-lift failures.

Why 15″ x 15″ is the sweet spot for most home businesses
The 15″x15″ covers standard adult fronts and most small logos. Compact, lower power draw, and manageable for a one-person setup. You can handle most shirt and small tote jobs without extra floor space.
When 16″ x 20″ becomes worth it
Upgrade to 16″x20″ when you run oversized graphics, larger blanks, or volume orders. The extra real estate speeds alignment and saves time per unit.
Bigger platens reduce edge lift for wide designs and help with bags. Seams and straps steal pressure, and the extra room compensates for that.
Adding platens and attachments: expand without a full swap
Swappable platens let you add capacity without buying a new machine. HTW Heat Press Platens run about $85–$220 for t-shirt, hat, or small-format options.
Swap carefully: pressure distribution, platen height, and clearance all shift with a new platen. One add-on can change timing and force, so recheck settings after any swap.
| Use case | Recommended size | Why it matters |
|---|---|---|
| Everyday adult shirts | 15″ x 15″ | Good balance of fit, cost, and power |
| Oversized fronts & bulk orders | 16″ x 20″ | Faster layout, fewer passes, lower rejects |
| Totes, bags, and odd blanks | 16″ x 20″ or specialty platen | Extra room for alignment and better pressure spread |
Only buy a bundle when the included add-ons match what you actually make. Otherwise, start with one versatile platen and add targeted ones later. Cheaper and less cluttered.
Settings that matter: temperature, time, and pressure for vinyl, sublimation, and DTF
Temperature, time, and pressure determine how a transfer bonds and how long it lasts. Get them wrong and you’re reprinting. Get them right and transfers survive dozens of washes.
Dialing in settings for HTV and layered vinyl
Start with the vendor’s sheet, then test. A typical starting point is ~305°F for 10–15 seconds for common heat transfer vinyl, but always verify with your vinyl brand.
Layered vinyl often needs a short tack press first — 2–3 seconds — to set pieces. Then finish with the full dwell to avoid shifting or glossy overcooking.
How sublimation changes your approach
Sublimation works differently. It needs polyester or coated blanks, and usually runs at lower temps for longer to get bright color and a soft feel.
Polyester guidance (about 270–300°F for 10–15 seconds) is a good range for many sublimation jobs. Pre-press to remove moisture and you’ll avoid washed-out prints.
DTF workflows and pairing with ready-to-apply transfers
DTF transfers (like HPN TruePrint DTF Custom Heat Transfers) simplify production when you don’t print in-house. Match your unit’s plate temperature and dwell to the transfer sheet instructions.
Trust the transfer vendor for starting numbers, then run a small sample. If the bond is soft, add 3–5 seconds or increase pressure slightly.
- Before every run: pre-press to flatten fibers, control moisture, use a protective sheet, and double-check temperature and time.
- Keep surfaces clean and pressure consistent every run.
- If a vinyl edge peels, lower temp or reduce dwell first. Overcooking can weaken the adhesive.
| Failure mode | Likely fix | Test tweak |
|---|---|---|
| Washed-out sublimation | Too cool or damp blank | Pre-press longer; raise temp slightly |
| Vinyl lifting after wash | Too little pressure or too short dwell | Increase pressure; add 3–5 sec |
| DTF under-bonded | Insufficient dwell or low temp | Extend dwell; confirm vendor temp |
Keep a small swatch log of settings and results. A five-minute test on scrap beats reprinting a full order.
Best specialty presses for mugs, tumblers, and hats
Mugs, tumblers, and hats each need consistent contact around curves and seams. A flat press won’t cut it, and neither will skimping on pressure.

Scaled mug option: HPN Signature Series Automated Sublimation Heat Transfer Mug Press
The HPN Signature Series Automated Sublimation Heat Transfer Mug Press is built for volume and repeatability (★★★★★, 340 reviews). It streamlines a sublimation workflow so you get consistent color and fewer rejects.
Budget mug and tumbler picks
If you’re testing drinkware, the HTW Horizontal Auto Mug Press ($99 on sale) and the HTW Elite Pro Tumbler Heat Press ($99 on sale) are sensible entry points. They let you add a new product line without a huge outlay.
Hat upgrades and when to buy one
Hats are deceptively tricky. Seams and curves steal pressure, so a dedicated unit pays off fast.
The Hotronix 360 IQ Hat Heat Press ($2,050) cuts rejects on structured caps. Compact hat options work fine for occasional runs, but once hats become a core product, the dedicated unit pays for itself.
When a tumbler machine makes sense
The HTVRONT A200 Auto Tumbler Heat Press is aimed at shops that sell cups as a primary product. If tumblers are a product line, not a side project, the right machine pays back in faster turnarounds and better output quality.
| Model | Best for | Price / note |
|---|---|---|
| HPN Signature Series | Scaled mug work, sublimation | ★★★★★ (340 reviews) |
| HTW Horizontal Auto | Entry-level mugs | $99 sale |
| HTVRONT A200 | High-volume tumblers | Efficient, high quality |
| Hotronix 360 IQ | Structured hats | $2,050 upgrade |
- Measure your most common cup sizes and cap shapes before you buy.
- Factor in warm-up time and batch layout when you estimate hourly throughput.
- Even contact around curves is what keeps transfers from fading, ghosting, or cracking. That’s the actual test.
Beginner-friendly heat presses for home crafters and pop-up markets
For pop-up booths and weekend crafts, portability and predictability matter most. I tell beginners this: you don’t need a giant unit on day one. You do need consistent temperature and steady pressure so you don’t waste blanks.
Ultra-portable mini options
HTW Portable Mini Heat Press ($39.95) is tiny, affordable, and great for patches, baby tees, and quick fixes. It stores easily and travels well.
HTVRONT H1 Mini hits 356°F (180°C), weighs about 0.4 kg, and has a teardrop plate that makes corners and curves simple to handle. Three settings keep things straightforward for new users.
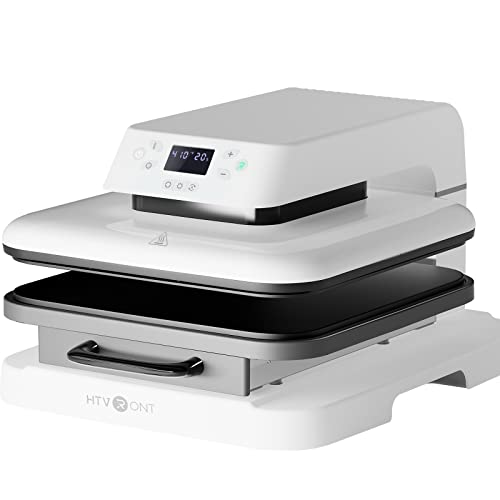
Easy-start automation for new users
HTVRONT Auto Heat Press 2 adds presets and adjustable pressure so you can focus on layout, not guesswork. It supports items up to ~4.5 cm thick, is optimized for sublimation and DTF, and includes auto shutdown for safety.
- Minis are ideal for small projects and pop-up sales. Watch the edges — even a small cold zone can ruin a transfer.
- Move to a 15″ x 15″ once orders grow or your designs get larger.
| Model | Key specs | Best use | Price |
|---|---|---|---|
| HTW Portable Mini | Compact, lightweight | Patches, sleeves, quick demos | $39.95 |
| HTVRONT H1 Mini | Up to 356°F, 0.4 kg, teardrop plate | Corners, curves, travel kit | Entry-level |
| HTVRONT Auto Heat Press 2 | Presets, adj. pressure, 4.5 cm capacity, auto-shutdown | Beginners wanting automation | Mid-entry |
Small business considerations: shop setup, tools, and total cost
The machine price is only part of it. Add-ons, supplies, and downtime all eat margins before you realize it.
Press stands and workflow add-ons
A caddie or stand speeds work and keeps things safer. The HTW Heat Press Stand/Caddie lists at $249.95 — a modest investment that saves bending and stabilizes workflow.
It’s worth it when you’re doing back-to-back jobs. Less fatigue, fewer mistakes.
https://www.youtube.com/watch?v=n52KWDG3Gfk
What to budget for beyond the machine
You’ll need vinyl, protective sheets, heat tape for sublimation, blanks, and alignment tools. HeatPressNation’s Graphic Alignment System (Tee Square It! + Logo GRID It!, ★★★★★, 110) speeds repeatable placement and trims rejects.
Bundle strategies and buying tips
Bundles make sense when you’re launching fast and need everything at once. The HPN TrueSpec 16″x20″ Hybrid Complete Bundle is worth a look for that scenario. If you’re focused on a single product line, build over time and skip the extras you won’t use.
Shipping and support expectations
In the U.S., check shipping timelines and damage policies before checkout. Good retailers offer live support and easy returns — vital if a product arrives faulty or a machine needs calibration.
| Starter tier | What to buy | Approx. cost |
|---|---|---|
| Hobby | Compact unit, basic vinyl, few blanks | $150–$300 |
| Side business | 15″x15″ unit, stand, alignment tools, vinyl stock | $500–$1,200 |
| Full shop | 16″x20″ or hybrid, bundles, multiple platens, inventory | $1,500+ |
Budget for supplies and support from day one. The machine is the easy part; consumables and downtime are where small shops lose money.
Buyer’s checklist for choosing a heat press machine in 2026
Before you buy, answer three blunt questions about what you make and how often you make it. That simple filter saves time and avoids costly returns.
Match the unit to your products
Shirts, bags, or mixed items? If you mostly do shirts, a 15″ x 15″ covers most jobs. Add a 16″ x 20″ when fronts or totes need one-pass coverage.
Hats and curved blanks need specialty platens. A flat unit won’t behave on curves.
Prioritize quality signals
- Platen size: big enough for your largest design in one pass.
- Surface temp: measured consistency beats whatever the spec sheet claims.
- Pressure control: dials or presets you can actually trust every run.
Choose the right productivity level
Ask: orders per week? If you press daily, auto-open or slide-out saves time and wrists. For occasional projects, a manual unit is fine.
Plan upgrades—mini → 15″x15″ → 16″x20″
Start small, then upgrade when order volume, design size, or fatigue become real problems. That path keeps cost low and options open.
| Stage | When to pick | Key benefit |
|---|---|---|
| Mini | Casual, demos, tiny patches | Portable, low cost |
| 15″ x 15″ | Most home businesses | Versatile, efficient |
| 16″ x 20″ | Large designs, higher volume | Fewer passes, better throughput |
Three mistakes sink most beginners: underbuying on size, ignoring workflow safety, and assuming every material uses the same settings. All three cost you time and blanks.
- If you make mostly shirts → start 15″ x 15″.
- If you add totes or bigger art → upgrade to 16″ x 20″.
- If you press daily → choose auto-open or slide-out for better productivity.
Wrapping Up
Choose two models, run a sample transfer, and you’ll see which one fits your workflow. For most makers, the HTW V3 manual ($99–$174.99) or the HPN MPress (high review counts) proves the idea without breaking the bank.
When you scale, move to a mid-tier auto-open or slide-out. The HTW V3 16″x20″ auto-open ($799) or HPN CraftPro (485 reviews) are the natural next steps. For serious throughput, the Hotronix Fusion IQ ($2,850) or Insta 780 Dual Shuttle ($9,265) pay off in speed and consistency.
Consistent heat transfer results, reliable pressure, and a workflow that reduces mistakes beat flashy specs every time. DTF, sublimation, or vinyl-heavy work will push you toward larger platens and firmer pressure control.
Bundles help when the included extras match your product line. If they don’t, buy core gear first and add only what you’ll use.
Pick two finalists, confirm your primary materials, and double-check U.S. support and shipping before you commit.
For more on real-world applications and how these tools are used across products, see this guide to their applications and uses.