Kate Donovan
A finished cycle should end with clean dishes—not another round of scrubbing.
The door clicks open, yet the frying pan still feels greasy, glasses look cloudy, and yesterday’s sauce has hardened onto a plate. Annoying as these results are, the pattern often reveals the cause. Grease across several items can point to cool water or weak detergent; grit may suggest a clogged filter or blocked spray arm; food on tightly packed dishes often traces back to poor loading.
As one of the essential appliances for a first home, a dishwasher usually needs routine attention rather than major repair. Detergent choice, water temperature, loading, and filter cleaning solve many residue problems. However, repeated failures across an entire load—even after those basics are corrected—may indicate low water supply, a failing heater, weak circulation, or another mechanical fault worth investigating.
What the residue reveals
Read the evidence left on the dishes
Not every cloudy plate is still dirty. Food soil usually appears as recognizable particles, dried smears, or material lodged around rims and utensil edges. Greasy film feels slick and may show faint rainbow colors under light; it is commonly associated with crowded loading, insufficient detergent, cooler water, or a cycle that was too gentle for the load.
Mineral deposits are typically white, chalky, or crusted, especially on glassware and heating-area surfaces. A small spot test with white vinegar can help: mineral residue often softens or wipes away. Grit feels sandy and may be redeposited food, detergent that did not dissolve, or debris returning from a dirty or incorrectly seated filter.
Cloudiness requires a closer look. Haze is only a description—it may be removable detergent or mineral film. Etching, by contrast, is permanent microscopic damage to glass, often appearing as an even cloudy finish that remains after vinegar and washing. Tea, coffee, tomato, rust, and some spices can also leave permanent stains even when the item is sanitary; plastic and worn finishes are particularly prone to holding color.
Check where the problem occurs
A pattern confined to the upper rack can suggest a blocked upper spray arm, poor docking of the rack’s water connection, or tall items below interrupting spray. Lower-rack residue points more toward the lower arm, filter area, or cookware blocking circulation. Problems limited to corners often reflect dense loading, while cloudy glass but clean plates suggests an item-specific issue rather than general wash failure.
Dishwasher layouts differ. Some models use removable manual filters; others combine self-cleaning filtration with a small food disposer. Machines may have two or three spray levels, soil sensors, adjustable racks, bottle jets, or targeted high-pressure zones. Those features alter loading and maintenance—not the basic standard for cleanliness.
A simple machine can wash thoroughly when its filter is clear, spray arms rotate freely, detergent suits the water, and dishes face the active jets. Targeted zones and sensor cycles help only when the correct setting and rack position are used.
When the load blocks the wash
Loading is part of the cleaning system. Spray arms need open paths, and each dirty surface needs exposure to circulating water and dissolved detergent. When items touch or shield one another, even a full cycle may leave sharply defined dirty patches.
Check the rack before starting
- Separate nested pieces. Bowls, spoons, and containers should not sit tightly inside one another.
- Avoid overlap. Stagger plates and alternate cutlery so water can reach both sides.
- Face soil inward or downward. Angle bowls toward the center; place cups and containers open-side down so they do not collect dirty water.
- Look for tall obstructions. Pan handles, cutting boards, and utensils must not stop a spray arm or block the detergent dispenser.
After loading, spin each spray arm by hand. It should rotate freely without striking anything. A quick sightline from the arm toward heavily soiled cookware can also reveal a plate or tray acting as a shield.
Removable countertop-appliance parts can be especially awkward. When considering whether an air fryer or toaster oven suits the kitchen, dishwasher-safe claims, tray size, and rack fit are worth checking—not just cooking performance.
Remove bones, peels, seeds, and thick clumps before loading. Routine pre-rinsing is usually unnecessary; on models with soil sensors, nearly clean incoming water may encourage a lighter wash than the remaining baked-on residue needs. Follow the manual when unsure.
When detergent never gets a fair chance
A dishwasher can circulate hot water normally and still underperform if the detergent is weak, released late, or washed away too soon. Before suspecting a pump, it is worth checking the product and how it enters the cycle.
Check condition and dose
Old detergent may lose cleaning strength, particularly enzyme-based powders and tablets kept for long periods. Moisture damage is easier to spot: powder forms hard lumps, pods become sticky or swollen, and tablets may crumble or fuse. Damaged detergent should be replaced and the new supply stored sealed in a dry cupboard—not beneath a sink prone to leaks or humidity.
Dose should match both the soil level and local water hardness. Too little detergent can leave grease and food behind, especially in hard water, where minerals consume some of its cleaning capacity. Excess detergent can create cloudy residue, a gritty film, or poor rinsing, particularly with soft water. The machine manual, detergent label, and a local water-provider hardness figure offer a sensible starting point.
Make sure it releases correctly
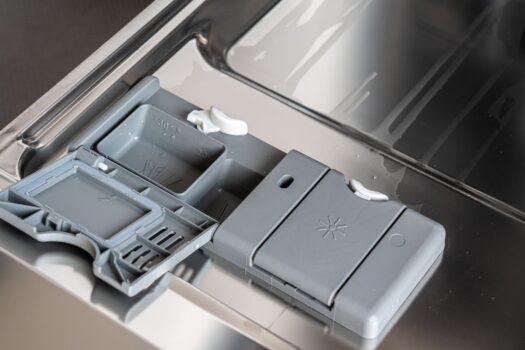
The dispenser lid needs clear space to open. A tall plate, pan handle, or utensil can trap it shut; a damp dispenser can also make powder or a pod stick inside. After loading, the lid should open freely by hand.
Unless the dishwasher manual says otherwise, pods belong in the dry detergent dispenser, not loose in the tub or cutlery basket. Loose pods may dissolve during the prewash, leaving little detergent for the main wash.
Rinse aid is separate: it helps water sheet off dishes, reducing spots and improving drying. It does not remove food soil and cannot substitute for detergent.
Inspect the filter, sump, and spray arms
-
Make the machine safe
Stop the dishwasher, let hot parts cool, and disconnect power as directed in the model manual. Remove the lower rack only after checking its release method.
-
Remove and inspect the filter
Follow the manual’s locking and lifting instructions; forcing the filter can crack its frame. Rinse away food, seeds, and loosened paper labels with warm water and a soft brush.
-
Check the sump without reaching blindly
Use a flashlight to inspect the well beneath the filter. Lift out visible debris with tongs, especially glass, bones, labels, or fruit pits, while leaving fixed covers and pump parts undisturbed.
-
Examine each spray arm
Confirm that the arms rotate freely, then look for seeds, label fragments, or mineral crust in the openings. Remove an arm only if the model instructions explain how.
-
Clear openings gently
Flush loose debris with water and use a soft brush or manufacturer-approved tool. Avoid knives, wire, or aggressive probing, which can enlarge spray holes and distort the wash pattern.
-
Reassemble and test
Seat and lock the filter securely, reinstall the arms, and spin them by hand before restoring power. Persistent odor may call for a more complete cleaning of a smelly dishwasher.
Broken glass can be nearly invisible in standing water. Wear cut-resistant gloves, use a flashlight and tongs, and never sweep the sump with bare fingers. If debris lies beneath a fixed guard, service guidance is safer than prying it open.
When wash water stays too cool
Dishwashers rely on heat, detergent, spray action, and time working together. Many models can raise water temperature during the cycle, but cool incoming water may delay cleaning or leave less effective washing time—especially when egg, starch, or sauce has dried onto dishes.
Match the cycle to the soil
Quick cycles suit fresh, lightly soiled loads. Eco programs often reduce water or heating and compensate with longer, carefully controlled phases; results can suffer when heavily soiled items are packed in or dried-on residue needs more soaking. A normal, heavy, high-temperature, or sanitize option may perform better, where the manufacturer permits it.
Check the accessible supply
Before starting, the nearest hot-water faucet can be run until the water turns hot. The shutoff valve under the sink should be fully open, and the visible supply hose should not be kinked or pinched.
A dishwasher normally uses far less water than a hand-filled sink. A shallow pool below the filter area can be normal; the tub does not need to look full. Persistent weak filling, unusual silence, or an error code warrants the model manual or service support.
Do not open electrical panels, remove the inlet valve, or loosen pressurized plumbing. If accessible checks do not restore performance, qualified service is the safer next step.
Warning signs that point beyond routine cleaning
What do silence and untouched detergent suggest?
If normal spray sounds never begin and detergent remains dry or partly intact, water may not be circulating. A stalled circulation pump, blocked dispenser, door-switch issue, or control fault is possible, but loading and spray-arm obstruction should be ruled out first.
What can unusually low water indicate?
A shallow fill may reflect a partly closed supply valve, kinked hose, clogged inlet screen, stuck float, or failing inlet valve. As with tracing the causes of a refrigerator not cooling, several simple conditions can resemble a component failure, so observations matter more than a single symptom.
Why is dirty water left in the tub?
A small amount beneath the filter can be normal; water covering the tub floor is not. A blocked filter, pinched drain hose, clogged sink connection, or weak drain pump may be responsible. Power should be disconnected before checking accessible obstructions.
When do leaks or error codes require service?
Stop the cycle if water escapes the cabinet, wiring smells hot, or an error repeatedly returns after a reset and basic cleaning. Door seals, pumps, sensors, valves, wiring, and control boards may require model-specific testing. Persistent failures are appropriate for qualified service, especially when panels or live electrical checks would be involved.
A controlled test helps separate setup trouble from a likely machine fault. Clean the filter and spray arms, confirm the supply valve is open, place a few normally soiled plates with clear spacing, add fresh detergent, and run the standard cycle without extra options.
Listen for filling and spraying, then check whether the dispenser opened, the dishes became hot, and the tub drained. If the same warning sign remains with this simple load, record the model number, error code, and cycle behavior before arranging service.