Kate Donovan
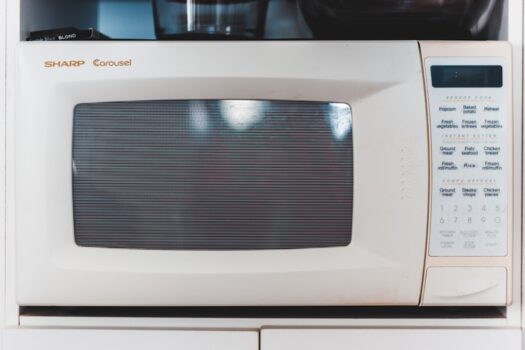
A microwave should never be given a second chance while the cause remains unknown.
A mug is turning normally when a blue-white flash snaps across the cavity, followed by crackling—or worse, smoke and the sharp smell of burning plastic. The correct response is immediate: stop the cycle, keep the door closed if flames are visible, and disconnect power when it is safe to do so.
The problem may be as simple as forgotten foil, metallic trim, or burnt food residue. It may also involve damaged interior coating, a scorched waveguide cover, or an electrical fault. Because those causes carry very different risks, restarting the microwave “just to check” is a poor test. Once unplugged and cool, the cavity and cookware can be inspected without removing the outer case. Persistent odor, fresh burn marks, repeated arcing, or any sign of internal damage calls for professional assessment or replacement—not routine reheating.
Signals that mean immediate shutdown
Never throw water into or onto an energized microwave. A suitable fire extinguisher should be used only when the fire is small, an exit remains clear, and the operator knows how to use it.
The outer cabinet should not be removed for troubleshooting. Microwaves contain a high-voltage capacitor that may retain a potentially lethal charge even after the plug is pulled.
Internal testing, capacitor discharge, magnetron work, and high-voltage repairs belong with a qualified appliance technician. Safe owner checks are limited to the cooking cavity, removable tray, plug, cord, and other externally accessible parts.
What the signs mean
- Electrical arcing
Electricity jumping across a gap, usually seen as bright blue-white flashes and heard as sharp snapping or crackling.
- Microwave-safe
A material intended for microwave use without producing sparks, melting, or transferring unwanted substances to food.
- Waveguide cover
A small mica or plastic-like panel inside the cavity that protects the microwave-energy opening from food and grease.
- Approved rack
A metal rack supplied or specifically permitted for that model, used only in the positions described by its manual.
Is it arcing or an ordinary noise?
A microwave normally produces a steady fan hum, a deeper operating buzz, turntable clicks, and occasional pops as steam escapes from food. Arcing is different: it usually creates intense, irregular flashes accompanied by crisp snapping or crackling. A hot electrical or ozone-like smell strengthens the warning.
When arcing begins, operation should stop promptly. After the appliance is disconnected and cool, the cavity can be checked without removing any fixed panels. The model manual remains the deciding authority, especially for racks, accessories, and cleaning methods.
Match the clue to the cause
| Likely cause | Typical clue | Appropriate action |
|---|---|---|
| Metal utensils or foil | Sparks jump from a fork, twist tie, foil edge, or metallic decoration | Remove the item. Use only containers and coverings approved for microwave cooking. |
| Food packaging | Arcing starts near a foil lining, metal handle, staple, or printed metallic trim | Transfer the food to a plain microwave-safe dish. Follow any package-specific microwave directions. |
| Grease or burnt residue | Flashes repeatedly appear at the same dirty spot, often near the waveguide cover | Clean the cooled cavity as directed in the manual. A scorched, cracked, or damaged cover generally requires proper replacement rather than improvised repair. |
| Metal rack | Sparks occur where the rack touches a wall, sits incorrectly, or is used with an unsuitable mode | Remove or reposition it only as the manual permits. An approved rack is not interchangeable with an ordinary oven rack. |
| Pointed or irregular food | Small flashes form around thin tips, sharp edges, bones, or closely spaced pieces | Pause cooking, rearrange or cut the food into more even shapes, and use the recommended power setting or cover. |
Metal is not automatically forbidden: some models deliberately use approved racks or limited amounts of smooth foil. The risk rises when metal has sharp edges, sits too close to the cavity wall, or is not intended for that appliance. If sparks continue after removable causes are eliminated, the microwave should remain out of service for assessment.
Inspect the cavity only after it cools
-
Disconnect power and wait
Unplug the microwave and allow the cavity, cookware, and food residue to cool. Work in bright light; a flashlight held at an angle can reveal scorch marks and chipped coating.
-
Remove loose, approved parts
Lift out the glass tray, roller ring, and removable rack, if fitted. Check each for foil fragments, burned food, cracks, rough metal edges, or damaged rack supports.
-
Check every cavity surface
Inspect the ceiling, floor, side and rear walls, corners, air openings, and the area beneath the turntable. Look for carbonized residue, exposed metal, bubbling paint, holes, pitting, or a concentrated arc mark.
-
Examine the door area
Check the inner door panel, viewing screen, hinges, latch points, and seal-contact surfaces for debris, warping, cracks, or looseness. The door should close evenly without force.
-
Inspect the waveguide cover without removing it
The small mica or plastic panel on an interior wall or ceiling should be flat, clean, and intact. Burning, cracking, soft spots, or a hole usually calls for correct replacement rather than continued use.
-
Clean only accessible surfaces
Use a soft cloth with water and a little mild dish soap. Loosen residue gently, avoid abrasive pads and harsh chemicals, keep liquid out of vents and openings, then dry all parts before reassembly.
Manufacturer instructions take priority, especially for removable racks, liners, and waveguide-cover replacement.
Household inspection should remain inside the accessible cooking cavity. Do not remove the cabinet, control panel, waveguide cover, or other fixed parts, and do not probe vents or openings.
Exposed metal, damaged door hardware, a burned-through cover, repeated sparking after cleaning, or uncertainty about the damage warrants service by a qualified technician.
Why the waveguide cover matters
The waveguide cover is the thin panel—often mica—over the opening where microwave energy enters the cooking cavity. It helps keep steam, grease, and food splatter out of the waveguide while allowing energy to pass through.
Residue on the cover can dry, carbonize, and become conductive. Once that happens, the same spot may arc repeatedly, leaving a dark pinhole, scorched edge, crack, or blister. Cleaning loose residue may help only when the cover and surrounding coating remain intact; a burned or brittle cover usually needs the correct model-specific replacement.
A light stain is more likely cosmetic when the surface is still smooth, solid, and free of peeling or pits. More serious signs include:
- Bubbling or flaking cavity coating
- Exposed, rough, rusted, or deeply pitted metal
- A hole, warped opening, or burned area around the cover
- Arcing that returns after residue is removed
These conditions call for model-specific assessment before further use. The underlying opening and nearby cavity surface may also need inspection, rather than simply fitting a new panel.
An improvised sheet of plastic, cardboard, foil, or generic mica is not a safe substitute. The oven also should not be run with the cover missing. Ordinary household paint is unsuitable inside a microwave; any touch-up product must be specifically approved for microwave cavities and appropriate for that model and location.
When the fault is inside
Sparking with no metal, food residue, or visible cavity damage can point to a fault behind the microwave’s panels. Flashes near a side vent, control area, or rear panel—and snapping sounds that continue with different microwave-safe containers—make an internal problem more likely.
Possible causes include a deteriorating magnetron antenna, burned wiring insulation, loose or overheated connectors, and faults in the high-voltage diode, capacitor, or transformer. Carbon tracking can also let electricity travel across damaged insulation, producing intermittent arcs and a sharp electrical odor.
These symptoms are not suitable for trial-and-error testing. The cabinet should remain closed and the microwave unplugged. Even after disconnection, the high-voltage capacitor may retain a dangerous charge; incorrect testing can also expose live circuits or microwave-energy shielding.
The manufacturer’s service channel or a qualified appliance technician can check insulation, grounding, interlocks, leakage, and high-voltage components with appropriate instruments. Depending on the microwave’s age and the damaged part, replacement may be more practical than repair.
If flashes appear behind a panel or arcing returns in a clean, empty cavity, stop using the appliance. Repeated operation can worsen hidden burning or insulation damage.
Repair or replace the microwave?
When repair still makes sense
Repair is more reasonable when the fault is limited, identifiable, and supported by available parts. Examples include a model-specific waveguide cover or cavity light component that can be replaced without opening the outer cabinet. Burned metal, damaged door hardware, widespread rust, or unexplained arcing points toward professional diagnosis or replacement instead.
Several factors can settle a close decision:
- Damage location: A removable cavity part is less concerning than damage near wiring, controls, the magnetron, or high-voltage components.
- Age and condition: Repair has more value on a newer, otherwise reliable unit. Multiple faults, corrosion, and worn controls make replacement easier to justify.
- Parts and support: Confirm that the exact model still has compatible parts and service information. Similar-looking substitutes may not fit or shield the waveguide correctly.
- Warranty or recall status: The manufacturer’s model and serial-number lookup may reveal warranty coverage, a service notice, or a recall. Contact the manufacturer before arranging paid work.
- Safe access: Any repair requiring cabinet removal should be left to a qualified technician. Unplugging does not make the high-voltage capacitor safe to handle.
Installation changes the calculation
A countertop microwave is usually straightforward to replace once its capacity, exterior dimensions, and electrical requirements are matched.
A built-in or over-the-range model involves more than choosing similar cooking power. Mounting brackets, cabinet cutouts, trim kits, door clearance, ventilation direction, duct alignment, and outlet placement may all affect compatibility. Professional removal or installation can therefore make a targeted repair more practical—provided the oven is otherwise sound and the fault can be corrected safely.
Use a simple rule: stop, inspect, resume only when a harmless cause has been removed and no damage remains. Repeated or unexplained sparking means the microwave should stay out of service until professionally assessed or replaced.