Kate Donovan
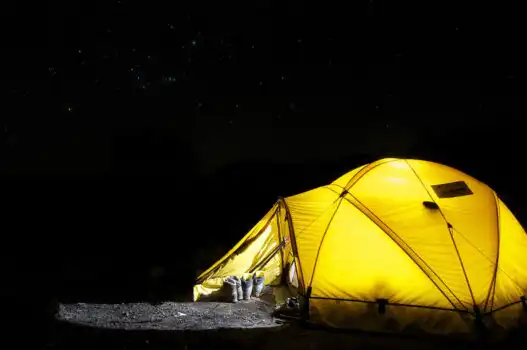
Few camping sounds are less welcome than droplets landing on a sleeping bag.
A shoulder brushes the tent wall, cold water shakes loose, and suddenly the foot of a sleeping bag feels clammy. The tent may not be leaking: breath, damp clothing, humid air, and cold fabric can create enough condensation to threaten insulation and electronics.
Even a well-pitched, waterproof shelter may be damp by morning. The realistic aim is moisture control, not perfect dryness—limiting buildup, preventing drips, and keeping vulnerable gear away from wet walls. Smart ventilation and protected storage usually matter more than chasing an impossible condensation-free night.
Condensation or a leaking tent?
Warm air inside a tent carries moisture from breathing, damp clothing, cooking, and wet ground. When that air touches fabric cooled below the dew point, water vapor becomes droplets. A waterproof fly can therefore be wet underneath even when it is performing correctly.
Condensation tends to increase during cold, humid, windless weather, especially beside lakes or on saturated ground. Several sleepers in a small shelter produce more moisture, while closed vents trap it. Clear nights can also chill the fly through radiative cooling, so droplets may form without rain.
Read the water pattern
The location and timing usually separate condensation from a leak:
- Condensation: Fine droplets cover broad areas of the fly or inner wall, often appearing overnight. Moisture may fall when fabric is bumped or wind shakes the tent.
- Seam leakage: Water follows stitching, gathers beneath seam tape, or appears in narrow lines during rain.
- Fabric damage: Dripping repeatedly starts at one puncture, worn patch, or spot where the coating has peeled.
- Wind-driven rain: Wetness appears mainly near an open vent, door, or poorly overlapped fly edge.
A dry-paper-towel check during rainfall helps: blot separate areas and trace the first recurring wet spot rather than judging from pooled water on the floor.
Choose a drier, breezier pitch
A slightly raised pitch usually stays drier and allows cool, damp air to drain downhill. Hollows collect that air like bowls, while stream edges, saturated soil, and lush vegetation continually supply moisture that can condense inside a shelter.
Look for firm, well-drained ground with light air movement. A practical site combines:
- A gentle rise rather than the lowest point nearby
- Sparse ground cover instead of dense, wet plants
- Enough shelter to soften gusts without blocking all airflow
Ventilation helps only while the tent remains stable. Ridges, exposed headlands, and gaps that funnel strong wind can strain poles, flatten fabric, and drive rain through vents. A position behind a natural windbreak is often better than either a sealed hollow or a fully exposed crest.
Tree cover can reduce radiative cooling, so a tent beneath an open canopy may collect less dew than one under a clear sky. However, dead branches, falling cones, sap, bird droppings, and lightning make some trees hazardous. Avoid damaged trees and hanging limbs, and never camp beneath a lone tree during storms.
Pitch the tent to keep air moving
-
Match the footprint to the floor
Lay down a footprint or groundsheet that stays fully beneath the tent floor. Exposed edges collect rain and channel it under the shelter, increasing dampness around the floor.
-
Square and tension the inner tent
Stake the corners evenly before raising the poles. A distorted inner can lean into the fly, creating contact points where condensation transfers directly to fabric or sleeping gear.
-
Attach the rainfly evenly
Center the fly, then tighten opposite corners in stages. Maintain a visible air gap between fly and inner; avoid cranking one side tight enough to pull the panels together.
-
Stake out panels and open vents
Use every relevant guy point to prevent broad panels from sagging overnight. Prop vents fully open and check that guylines, snow, vegetation, or stored equipment do not block their airflow.
-
Recheck after the fabric settles
Rain, wind, and cooling temperatures can loosen a pitch. Retension guylines before sleep, while keeping doors and vents open as far as conditions safely allow; tents designed for harsher weather often offer protected vents that remain usable in driven rain.
Do not sacrifice secure staking or expose an upwind door during severe weather. Keep low and high vents open when sheltered by the fly, then reduce openings only enough to stop wind-driven rain or spindrift.
Create a low-to-high airflow path
Condensation clears fastest when fresh air enters near the floor and moist air escapes near the roof. Warm, humid air rising through a high vent draws replacement air through low fly vents or gaps. Both ends must remain open for this chimney effect to work.
When weather permits, partially unzip opposing doors or vestibules. Small openings create cross-flow, especially when aligned with a light breeze. To limit rain splash, open the sheltered or leeward side farther and favor covered upper zip openings. Keep gear and loose fabric clear of the low-to-high route.
Sealing every opening does not necessarily make a tent warmer. Tent fabric provides little insulation; pads, bags, and clothing retain most warmth. A sealed shelter reduces drafts but traps vapor that can dampen insulation and leave occupants colder. In driven rain, strong wind, or blowing snow, prioritize protection and increase ventilation when conditions ease.
Keep wet gear out of the sleeping area
-
Create a wet zone in the vestibule
Place muddy footwear on a groundsheet, tray, or open waterproof bag. Keep it clear of vents and tent fabric.
-
Remove rainwear before entering
Shake off water outside, then hang rainwear in the vestibule without letting it touch the fly or inner wall.
-
Do not dry clothes inside
Wet socks, towels, and layers release moisture into the shelter. Store them separately and dry them outdoors when conditions improve.
-
Increase ventilation for every sleeper
Each additional person adds moisture through breathing and damp gear. Open vents or doors farther as occupancy rises, while maintaining rain protection.
Never cook or operate a stove, grill, or fuel-burning heater inside the tent or vestibule. Flames and exhaust create fire and carbon-monoxide hazards, while combustion also releases water vapor that worsens condensation.
Keep bedding clear of wet walls
Even with good ventilation, some droplets may form. Leave several inches between the tent wall and sleeping bags or quilts, especially near the foot and head where lofted insulation can brush the fabric overnight.
Organize the floor
Place pads toward the center rather than wedging them against sloping walls. If space is tight, overlap unused floor edges instead of compressing bedding; selecting sleeping pads that suit side sleepers can also reduce sprawling and keep the sleep system contained.
Keep loose clothing in a stuff sack rather than piled around the perimeter. Phones, batteries, headlamps, medications, and spare insulation belong in waterproof dry bags or sealed pouches—not merely water-resistant pockets.
Before sitting up, packing, or opening the door, use a small absorbent cloth to wipe larger droplets from the fly or inner wall. Movement can shake condensation directly onto bedding. A quick check around the footbox and tent corners is particularly worthwhile, since those areas are easy to bump while dressing or rearranging gear.
Air damp insulation promptly
Airing damp insulation is most effective during a dry, breezy break in the weather. Remove the bag from the tent, shake it gently, and spread it loosely over a clean line, dry rock, or sun-warmed fly. Turn it occasionally and keep it away from wet ground; pack it only after the fabric and fill feel dry.
Down can clump and lose substantial loft when wet, then take a long time to recover. Synthetic fill usually preserves more loft while damp, but it can still feel colder, gain weight, and dry slowly inside a packed shell. The differences between down and synthetic insulation in damp weather affect the margin for error, not the need for ventilation, wall clearance, and regular drying. Avoid prolonged harsh sun, which can age shell fabrics.
Judge the shelter as a complete system
-
Construction and wall design
A full fly and separate inner usually keep occupants away from a wet outer layer. Check seam quality, fly coverage, and whether the inner uses mesh, solid fabric, or both.
Look forConstruction suited to the expected rain, wind, temperature, and privacy needs.AvoidChoosing ultralight fabric or abundant mesh without considering the likely climate. -
Ventilation that remains usable
Low inlets, high vents, and adjustable doors should work without exposing the interior to ordinary rain. A taut fly needs a consistent air gap from the inner tent.
Look forVents that can be adjusted from inside and propped open securely.AvoidTiny fixed vents, blocked fly gaps, or designs that require opening the shelter to wind-driven rain. -
Honest space and storage
Published occupancy can mean tightly packed sleeping pads rather than comfortable living space. Compare floor dimensions, wall slope, peak area, and vestibule capacity against the full camping and hiking gear checklist.
Look forEnough clearance to keep sleepers and gear away from damp walls.AvoidRelying on the person rating alone, especially with wide pads or bulky packs. -
Ground protection and accessories
A footprint should match the tent floor or sit slightly inside its edges; exposed material can collect rain underneath. A small absorbent cloth and waterproof gear sacks help contain moisture.
Look forA correctly sized footprint and accessories that isolate or remove moisture.AvoidOversized tarps, uncovered wet gear, or accessories marketed as a complete condensation cure.
Double-wall tents generally provide the best separation from condensation, but add weight and pitching complexity. Single-wall tents save weight and pack space, yet demand disciplined venting and often feel damper in cool, still weather. Mesh-heavy tents excel in warm conditions and offer strong airflow, though they provide less privacy and can feel drafty.
No design eliminates condensation. The better choice matches ventilation control and weather protection to the conditions most often encountered.
Read the moisture, then reset camp
-
Fine mist across the inner
Humid air is being trapped. Open a low inlet and high outlet, then move wet clothing or shoes outside the sleeping area.
-
Heavy drops overhead
Warm breath is collecting beneath a cold roof. Increase high-level exhaust and wipe the ceiling before drops reach bedding.
-
One wet wall or corner
Contact, slack fabric, or a blocked fly gap is likely. Recenter gear, restore clearance, and retension the pitch.
-
Water around floor edges
Check for an exposed footprint, runoff, or wet equipment. Tuck ground protection under the tent, relocate damp items, and mop up standing water.
-
Dry before storage
Each morning, wipe and shake out the shelter, pack wet panels separately, then air everything fully at the next dry opportunity.
Condensation control comes from a repeatable routine: choose the pitch carefully, preserve airflow, contain wet gear, inspect moisture patterns, and dry the shelter promptly. Several small adjustments outperform any “condensation-proof” claim.