Kate Donovan
The first cabinet sets the course for the whole run.
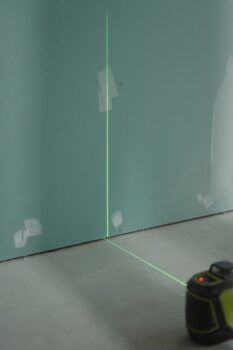
A wall cabinet held in place can block the laser line meant to guide it. Bright work lights can make the remaining line hard to see, too. A green laser may be easier to spot indoors, but it still needs a clear path across the wall; moving the tool or dimming a nearby light can help.
Before mounting, mark the intended height at both ends of the run and check the projected line against those marks. Confirm that the laser is level, then check the first cabinet with a spirit level before fastening it. A small error there can follow every cabinet that comes after it.


What matters at cabinet-working distances
-
A visible line with stated accuracy
A green line may be easier to see on a wall or cabinet face, but brightness does not make it a reliable reference. Check the maker’s accuracy specification at a stated distance, then confirm critical marks with a level before fastening.
Look forA clear line and a published accuracy figureAvoidTreating brightness as proof of precision -
Coverage that fits the layout
Cross-lines are enough for a short cabinet run when the laser can face the work. A 360-degree plane earns its place when marks must carry around corners or across several walls without repositioning.
Look forLines that reach the needed surfacesAvoidPaying for planes the job will not use -
A mount that holds the line
A stable mount matters when cabinet edges block the beam. Check whether the bracket can attach where needed: a magnetic mount needs steel, while a clamp or tripod may offer more placement options.
Look forSecure positioning at the required heightAvoidAssuming magnets attach to wood cabinets -
Usable range and dependable power
Compare the published visible working range, not just a longer receiver-assisted rating, with the actual room size. For longer layouts, consider whether the battery can last the session or be replaced without stopping work.
Look forRelevant range and practical battery lifeAvoidMistaking receiver range for naked-eye visibility
Huepar HM03CG: Room-wide lines for cabinet layout
01
Bright coverage and magnetic mounting for cabinet layouts.
The Huepar HM03CG is a rechargeable green laser with three 360-degree planes. It suits cabinet runs where a horizontal height reference and plumb lines are needed on more than one wall. The magnetic bracket provides a mounting option, while the hard case keeps the laser and accessories together between jobs.
- A horizontal line wraps around the room, reducing moves between cabinet runs.
- Two vertical planes provide plumb references for checking cabinet positions.
- The included magnetic bracket helps position the laser on suitable metal supports.
- Upper and lower cabinet heights still require separate horizontal settings; three planes do not mean two height lines at once.
- Finding a stable mounting spot with clear sightlines takes more setup than a quick local check.
- The rechargeable battery needs to be charged before a long installation session.
For upper and lower cabinet work spread across several walls, the HM03CG offers a useful combination of wraparound coverage and plumb references. It cuts down on moving the laser, but changing cabinet heights still means adjusting the horizontal plane. Charge it ahead of time and mark key endpoints where cabinets may hide the beam.
DEWALT DW089LG: A durable laser for repeat cabinet layouts
Worksite-ready build with rechargeable battery and carrying case.
The DEWALT DW089LG is a three-plane, 360-degree green laser suited to installers who lay out cabinets across multiple walls or rooms. Continuous horizontal and vertical references let an installer check a cabinet run without repeatedly moving the tool. It comes with a 12V MAX battery, charger, and carrying case. For occasional home projects, it is worth considering whether the 12V platform fits other cordless tools before adding another charger.
- Three 360-degree planes keep references available across adjacent walls.
- Green lines are easier to pick out than red lines in many indoor settings.
- IP65-rated, overmolded housing suits dusty, busy jobsites.
- More coverage than a one-off cabinet installation may need.
- Requires a place to set or mount the tool where cabinets will not block the line.
- A separate 12V MAX battery system may be inconvenient for some households.
Bosch GLL50-20G: Cross-lines for a tight cabinet layout
Compact cross-line alignment with flexible battery options.
The Bosch GLL50-20G projects a horizontal line for setting cabinet height and a vertical line for checking a cabinet edge. Its compact body suits a kitchen corner or a short run where existing fixtures leave little room to place a laser.
Set it where the beams can reach the marks without passing behind a cabinet. The two lines can then be checked against those marks before fastening begins.
- Green horizontal and vertical lines make height and plumb checks easy to see.
- Compact body is practical in confined work areas.
- Included magnetic mount offers placement on suitable metal.
- Magnetic mount requires a stable steel attachment point; wood and drywall will not hold it.
- A longer wall may require repositioning the tool and checking the line against reference marks.
Fanttik D2: A pocket laser for small cabinet adjustments
Portable, rechargeable alignment for smaller DIY jobs.
The Fanttik D2 is a pocket-size green cross-line laser for the smaller jobs around a cabinet installation: lining up a single cabinet, checking a short stretch of hardware, or making an adjustment after mounting. Its compact format suits occasional home projects where a full room-wide layout is not needed.
- Small enough to keep close for quick alignment checks.
- USB-C rechargeable, with a magnetic bracket included.
- cons
- A magnetic bracket needs a suitable mounting surface or support.
- A full cabinet run calls for checking the published range and accuracy before relying on one setup.
Klein Tools 93CPLG: Three-plane references for cabinet runs
Three bright planes for wide-ranging alignment work.
The Klein Tools 93CPLG is a compact, self-leveling laser for cabinet layouts that need more than a single line on one wall. Its three green 360-degree planes provide horizontal and vertical references at the same time, so the same setup can guide a run of cabinets and alignment on an adjoining wall. That is useful when checking upper-cabinet height while locating vertical edges or transferring marks around a corner. Cabinet boxes can still block the beam, so reference marks remain worth making before installation.
- Three 360-degree planes keep horizontal and vertical references available with fewer setup moves.
- Integrated magnetic mount and tripod thread offer placement options.
- cons
- best_for
- not_for
- Cabinets and corners can interrupt a projected line; marks may still be needed.
- Three planes add little when the job needs only one short horizontal line.
Keep the line clear during installation
A bright laser is little help if an upper cabinet blocks the beam. Set the laser to one side of the run, where its line reaches the wall without passing behind cabinet boxes, clamps, or the installer. Before lifting a cabinet, check that the reference remains visible at both ends of the run.
If the line disappears as cabinets go up, move the laser and recheck it against the original marks before fastening the next box. Another option is a measured offset: place the line a fixed distance above the intended cabinet height, then measure down from it at several points. Use the same measurement each time rather than judging the gap by eye.
Daylight from a nearby window can wash out a green line; shading the work area or reducing room light may make it easier to read. At close range, a line still has width. Mark its center or the same edge at every point, and keep the laser at the same working distance where practical.
Set a reference that survives the cabinet run
-
Mount the laser where it cannot shift
Use a firm tripod or bracket, clear of doors and foot traffic. A magnetic mount is only as steady as the surface holding it.
-
Let it self-level
Check that the unit is within its specified self-leveling range and wait for the line to settle. A flashing or otherwise unsettled line is not a layout reference.
-
Check the line before marking
Compare it with a reliable spirit level, or mark an endpoint, move the laser, and confirm that the line returns to the mark.
-
Set the height from the floor’s high point
Find the highest spot beneath the cabinet run. Measure the required cabinet height upward from there, then mark the horizontal reference; lower spots will need shims.
-
Install the first cabinet, then keep checking
Set the first cabinet to the checked reference and verify it with a level before fastening. As each cabinet joins the run, check its height and alignment rather than relying on the projected line alone.
The laser shows a reference, not the shape of the floor or wall. Shim beneath cabinets where the floor falls away, and check for bowed walls before pulling cabinets tight with fasteners.
For an occasional cabinet adjustment, the Bosch GLL50-20G’s cross-lines are enough without setting up a room-wide reference. For a run that requires checking the line from several positions, the Huepar HM03CG’s 360-degree coverage is more useful. When a horizontal line and plumb references need to remain available together, choose the Klein 93CPLG—or the tougher DEWALT DW089LG for frequent site work.
Before buying, compare published accuracy, range, mounting options, and power with the room and installation time. Check the projected reference against a level or measured marks before fastening the first cabinet.